A forearm or full-arm stencil transfers the design in purple ink that stays visible for about 2 hours while the artist works, and seeing it laid out at full scale before the needle starts is the only chance you get to adjust placement or proportion.
The right stencil idea depends on how much room you need for future additions: a small bird on a stem leaves space around it, while a full Celtic sleeve or dual-figure layout commits the arm in one go.
1. Forearm Stencil Tattoo
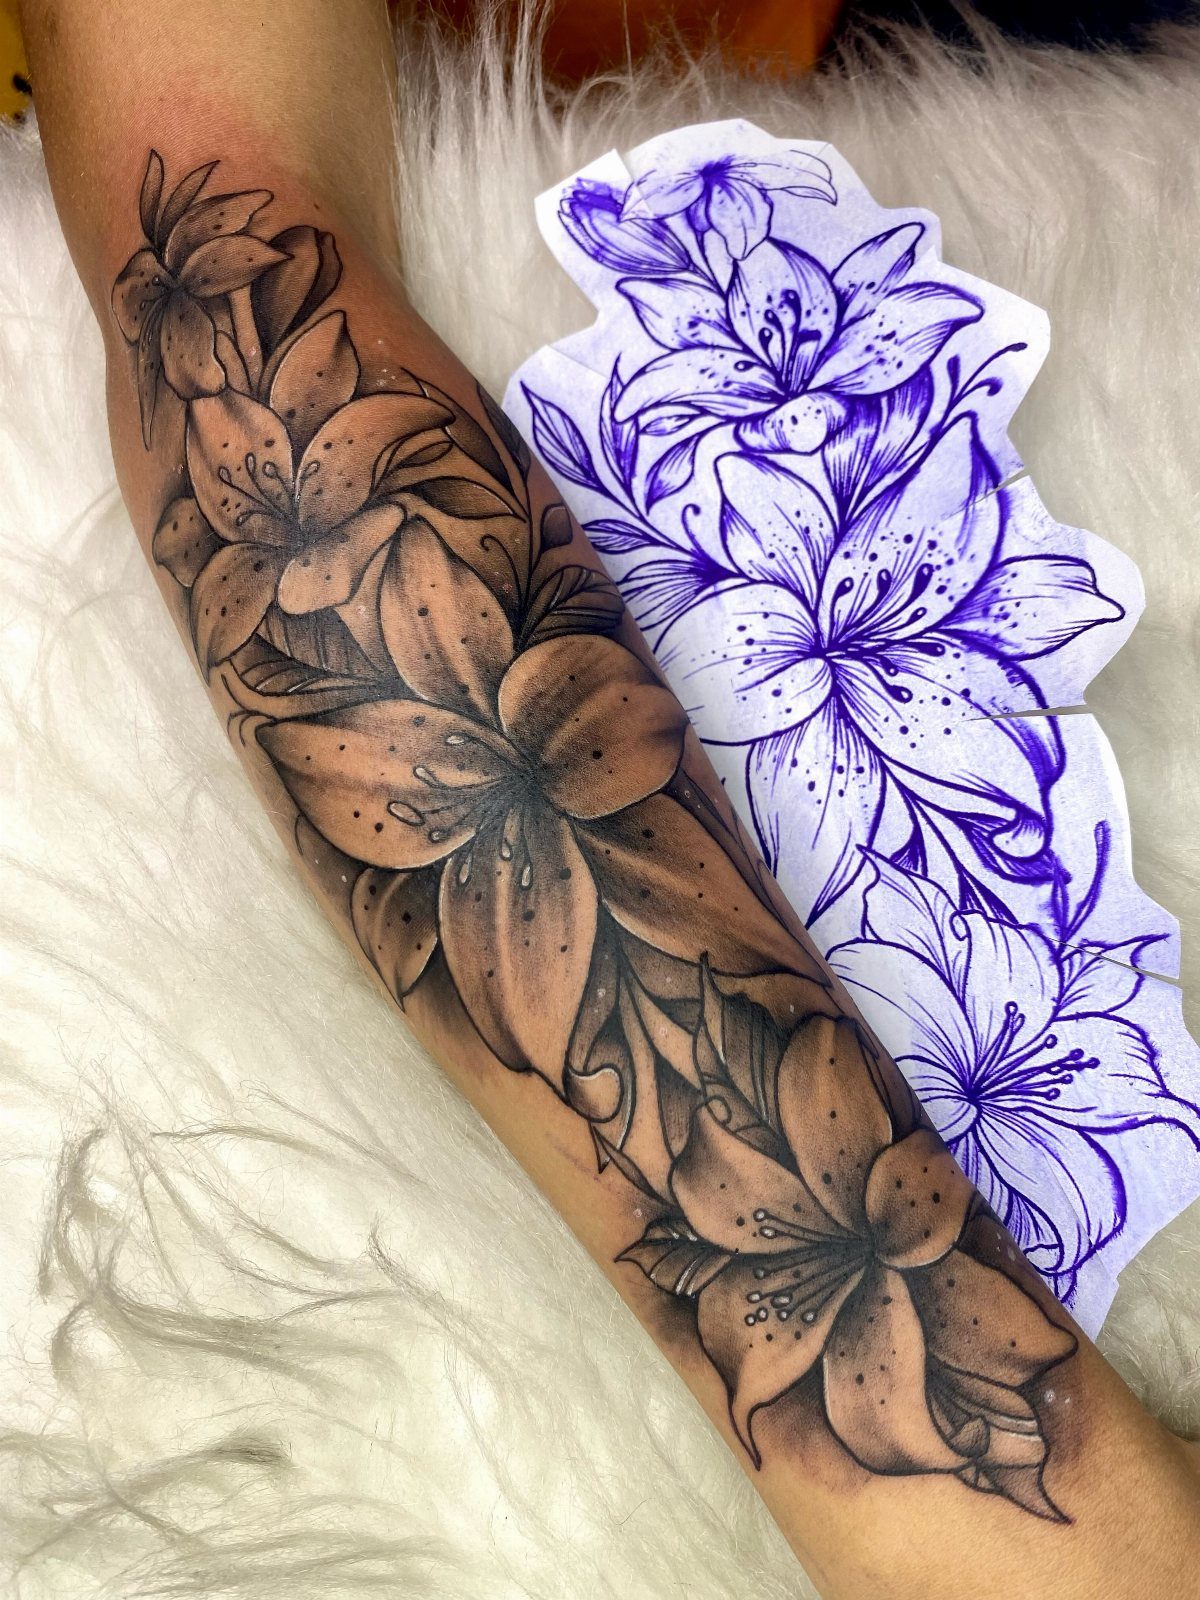
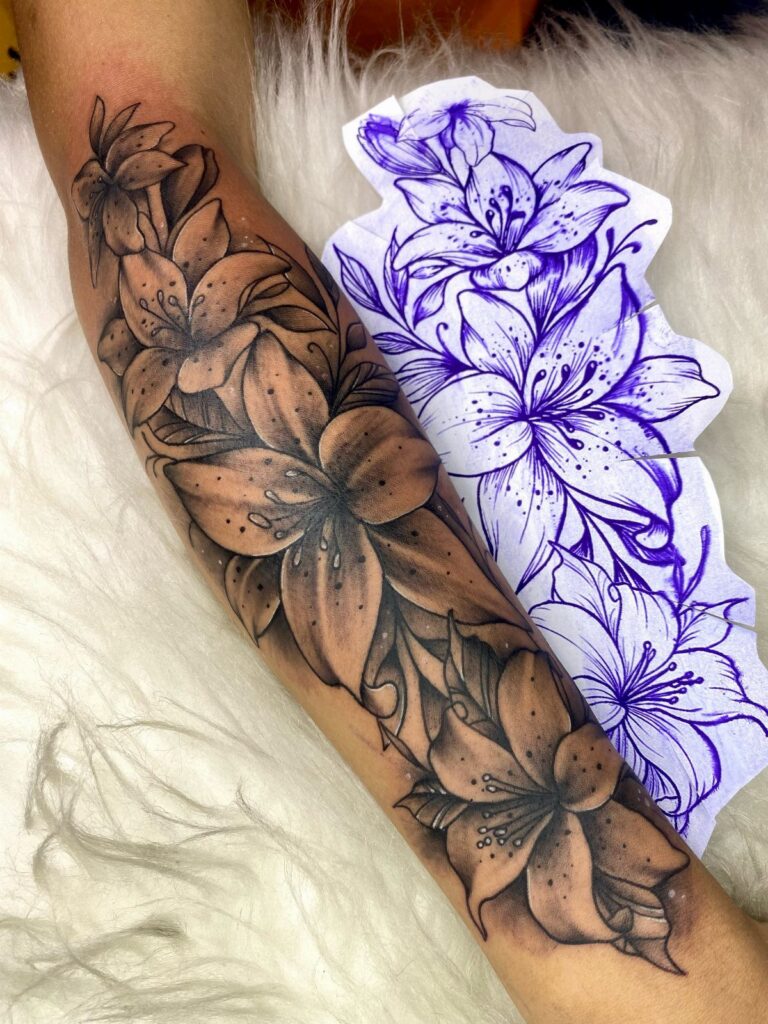
A forearm stencil shows the design in purple transfer ink before the needle touches skin.
The stencil lines guide the artist through shading and detail, and seeing it laid out full-scale lets you check placement and proportion while you still have time to adjust.
Most artists apply the stencil with thermal paper or hand-drawn carbon transfer. The purple stays visible under the machine’s wipe-downs for about 2 hours, longer if your skin stays dry.
If any line feels off once the stencil is down, speak up. Moving it now is quick; fixing a permanent outline later takes a cover-up or removal.
2. Celtic Knot Design
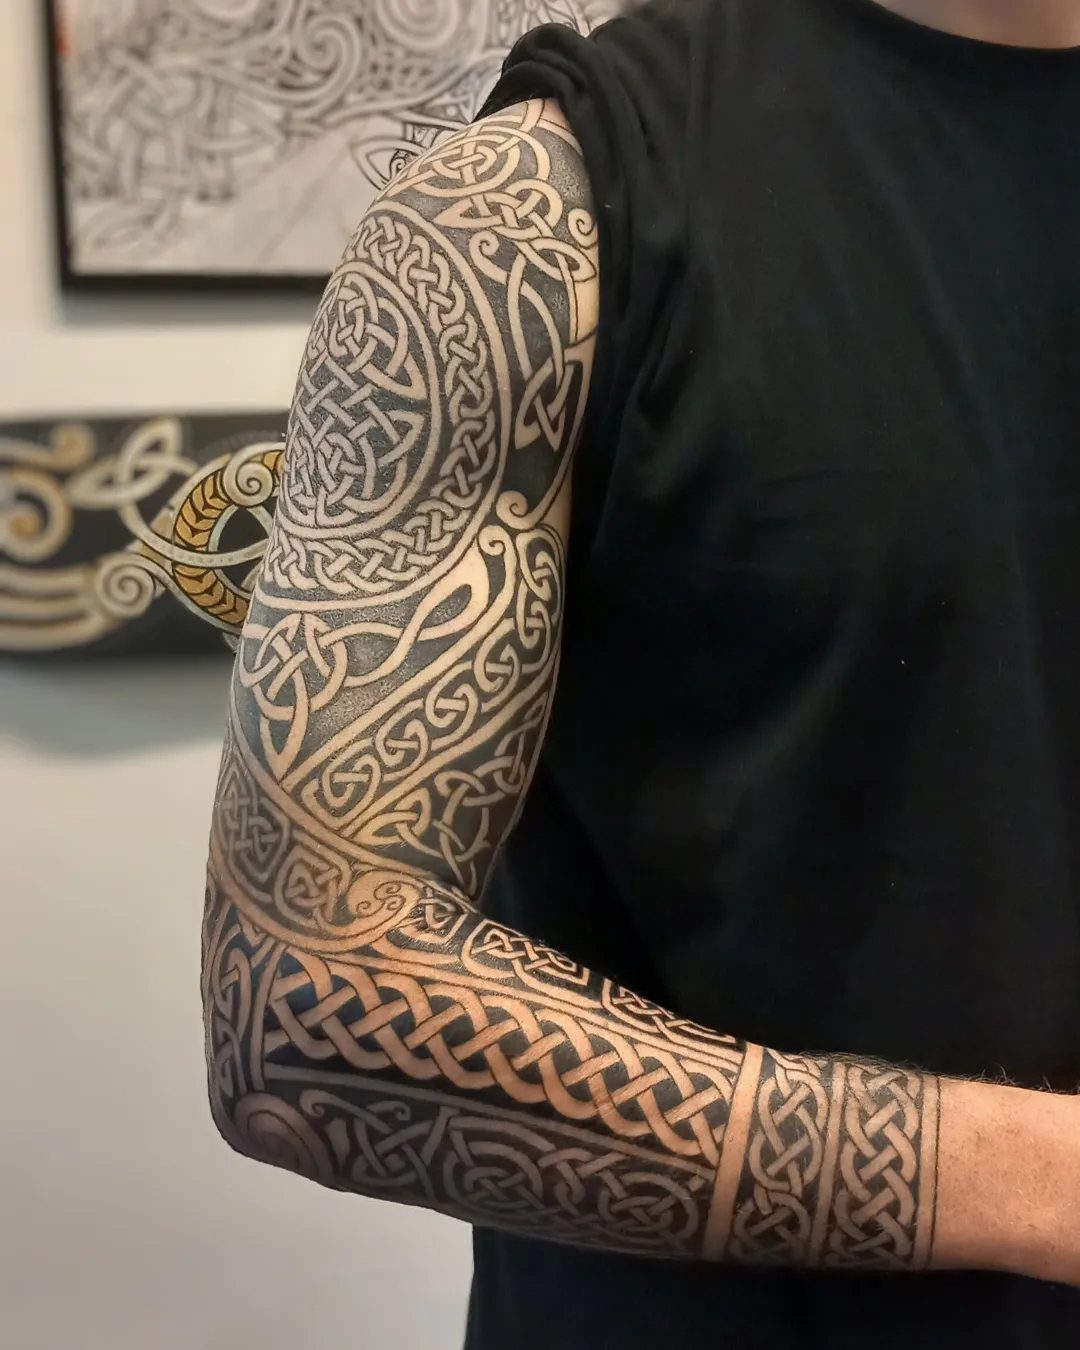
Celtic knots lock together without a visible start or end, and a full sleeve built from them reads as one continuous weave.
The pattern sits tight to the arm’s shape, so each section needs to account for how muscle shifts the lines when you move.
A skilled artist will adjust the knot spacing around your elbow and wrist to keep the design legible through bending. A sleeve this dense takes multiple sessions, with each sitting running several hours.
Black ink alone keeps the pattern sharp. Adding color or shading between the cords can soften the contrast and make the knotwork harder to follow once it heals.
3. Birds and Flowers
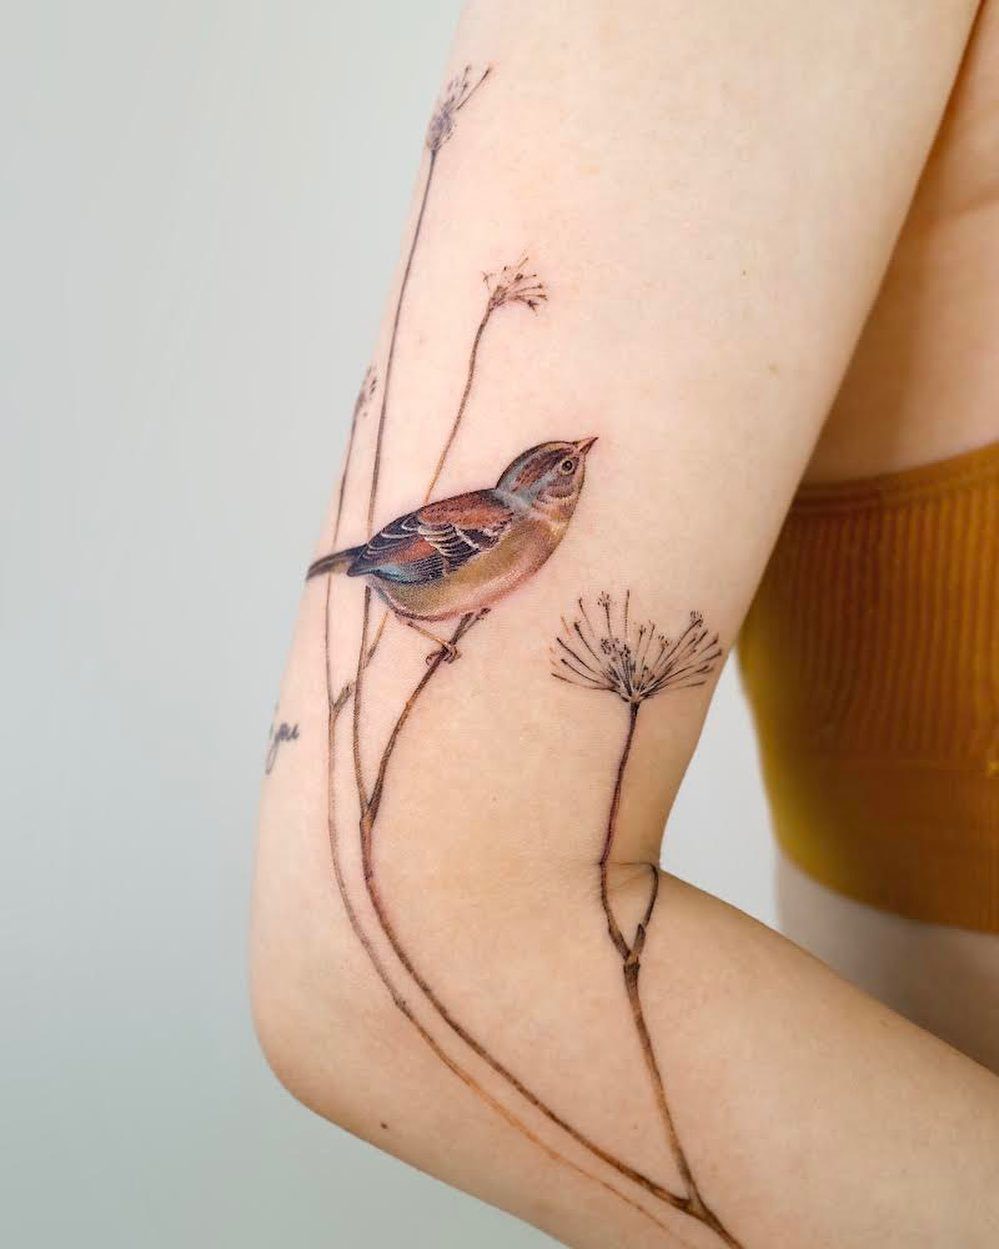
A small bird perched on a thin stem keeps the design light and leaves room to add more later.
The detail suits a forearm because the skin there stays fairly flat and holds without blurring as much as it would over joints or heavily textured areas.
Color on a bird this size fades faster than black, so plan on a touch-up within 2 to 3 years if you want the brown and seed tones to stay crisp.
Placement matters: too close to the wrist and the bird can read upside-down when your arm hangs naturally, so position it where it faces forward when your palm turns up.
4. Abstract Geometric
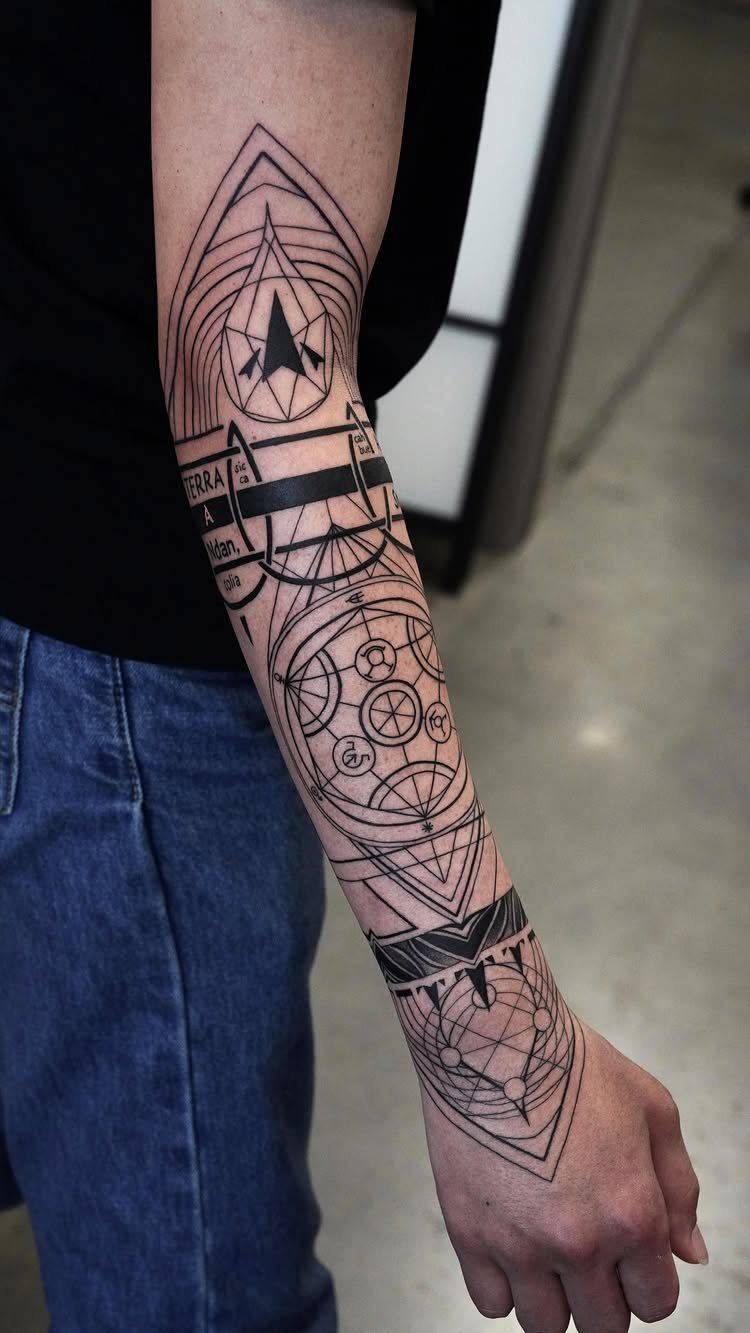
Abstract geometry builds a design from shapes and lines that do not represent anything literal. The bold black sections anchor the composition, and the open circles and text fragments let the pattern breathe without filling every inch of skin.
This style scales well because you can add new shapes later without needing them to connect to a narrative.
A stencil for geometric work needs to be placed exactly where you marked it; even a small shift changes how the lines relate to your arm’s natural contours.
Freehand geometry rarely holds up. Stencils keep the angles consistent and the spacing even, which is what makes the design read as intentional rather than improvised.
5. Japanese Wave
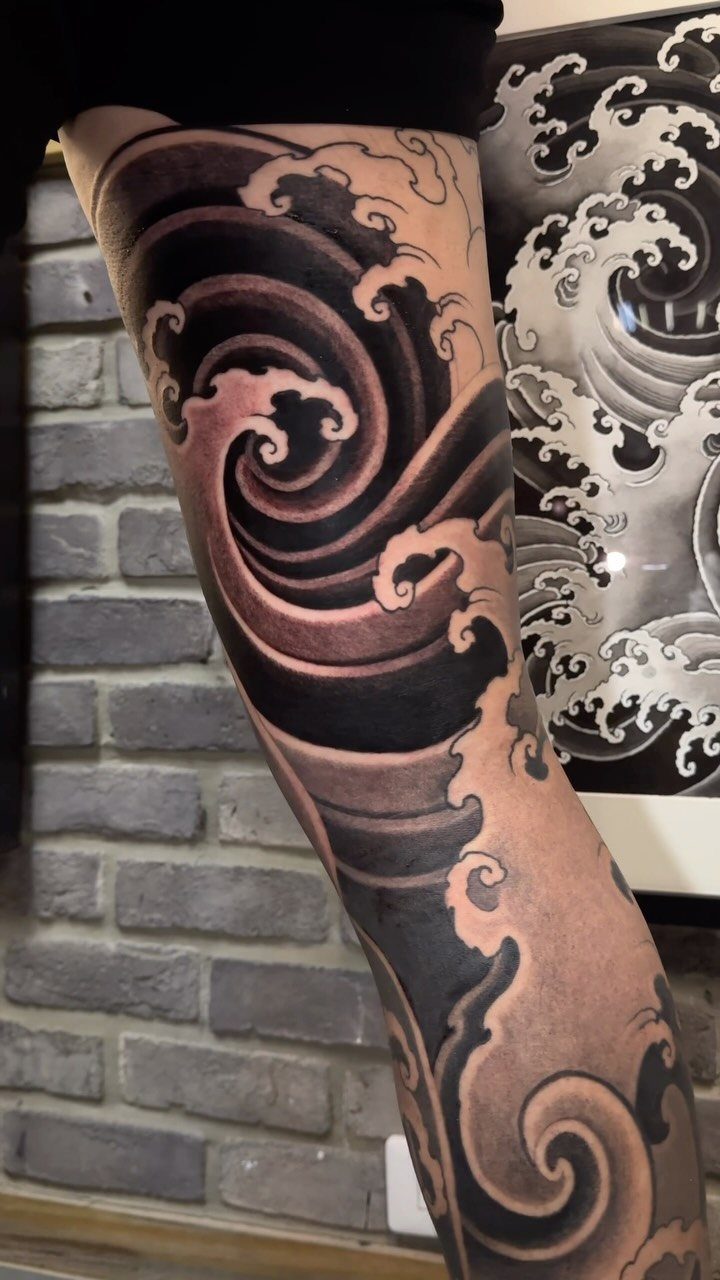
Japanese wave designs pull from Hokusai’s woodblock prints, and the cresting foam translates well to a forearm because the curve follows the muscle. The black ink and grey shading give the wave depth without needing color to define the motion.
A stencil for this style has to account for how the wave wraps around your arm.
Flat reference art does not translate directly; the artist adjusts the curve so the crest stays visible from the front and the foam does not disappear around the side when your arm turns.
Placement on the outer forearm keeps the design readable in short sleeves. Inner arm placement hides it more but can distort the wave when your elbow bends.
6. Transfer Tattoo Stencil to Skin
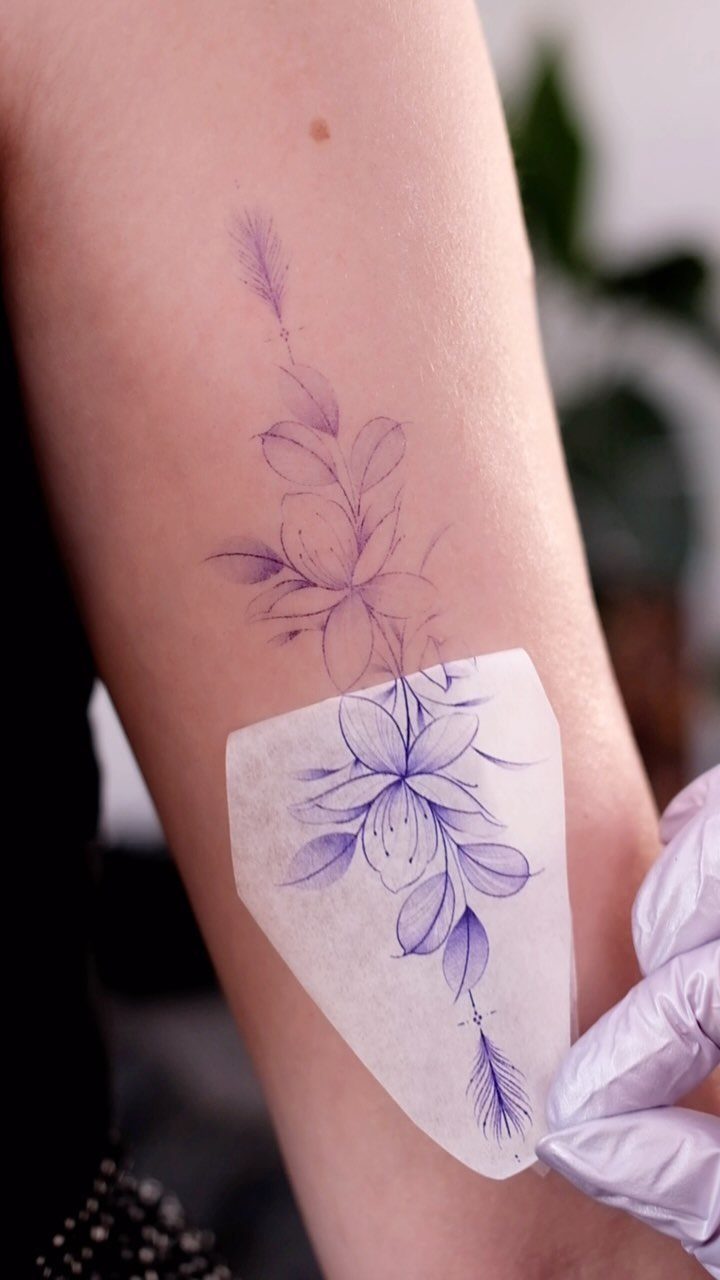
Transferring a stencil means pressing thermal paper against clean, shaved skin, then peeling it away to leave the purple design. The stencil has to stay still or the lines smudge.
Stencil fluid or stick deodorant helps the design adhere, but too much leaves a slick layer that the ink cannot penetrate. A thin coat is enough.
Once the stencil is down, avoid touching it or leaning on anything.
The purple wipes off easily, and redoing a smudged transfer adds time to the appointment. If a line looks crooked after the peel, ask the artist to clean it off and reapply before the needle starts.
7. Detailed Line Work Tattoo Stencil
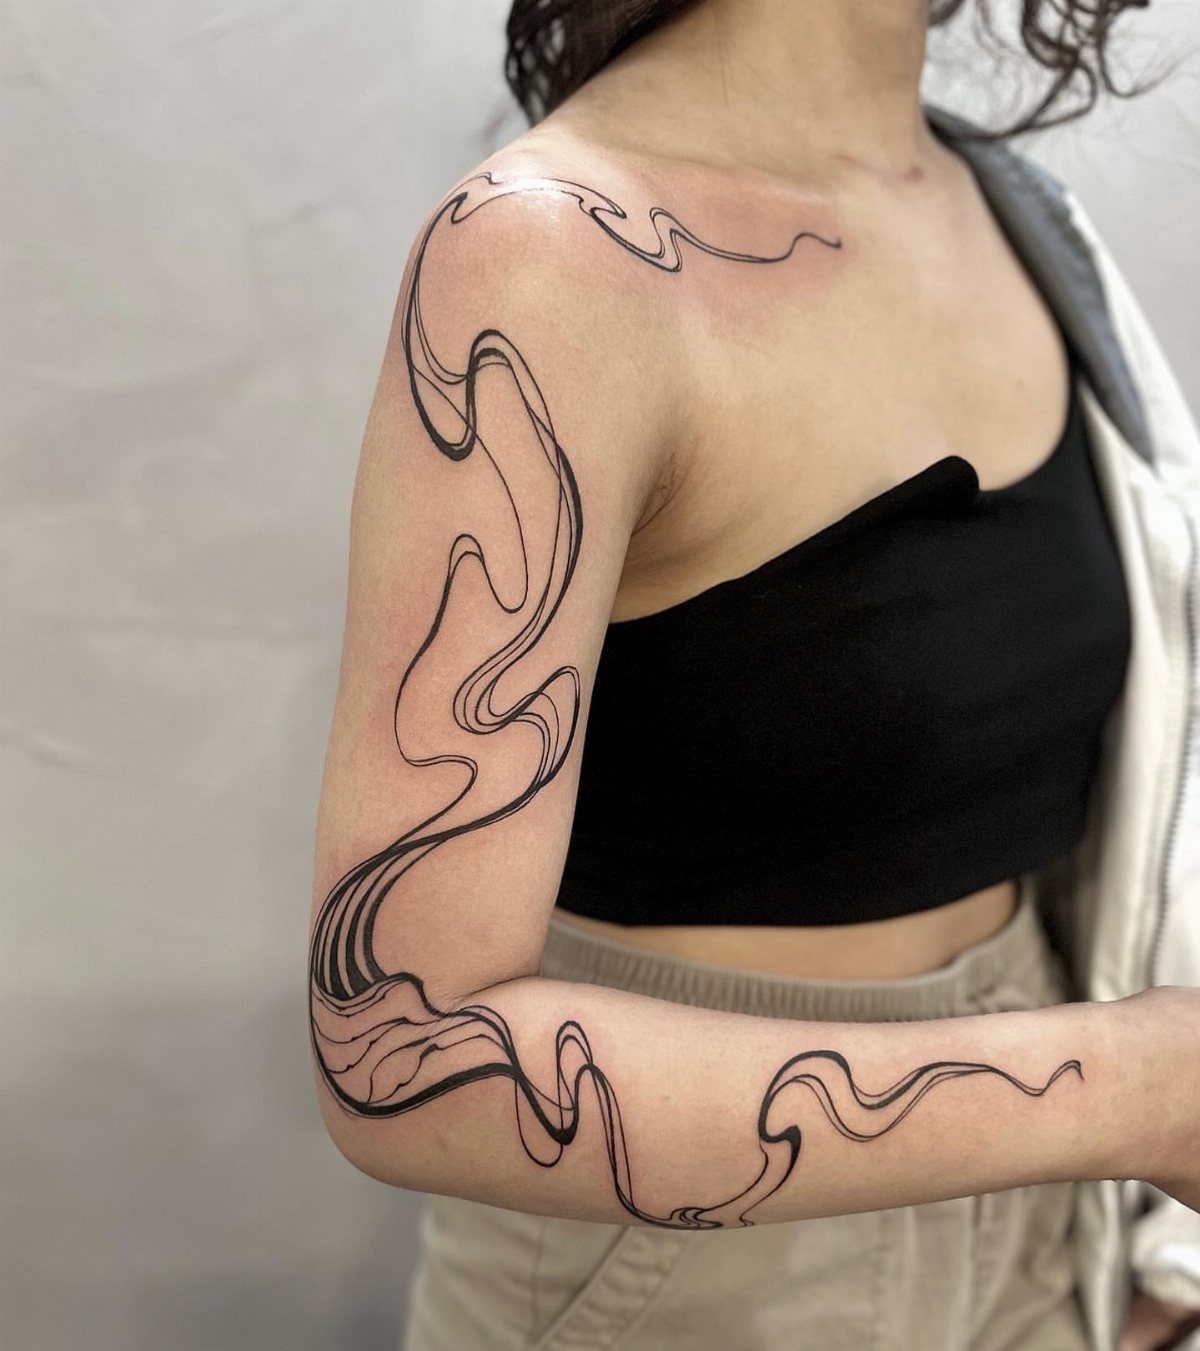
A stencil that holds every detail matters here, because a line this thin leaves no room to fix a wobble once the needle starts.
The flowing abstract shapes wrap the shoulder and upper arm in one gesture, and the stencil has to stay intact through the whole session or the artist loses the guide.
A design this delicate suits placement on the outer arm where the skin stays taut.
Inner arm or elbow folds can blur thin lines as they heal, and touch-ups on work this light often darken the line more than you want.
Aftercare matters more here than with bold work. A scab that lifts early can pull ink out of a fine line and leave a gap.
8. Inking Over Arm Stencil
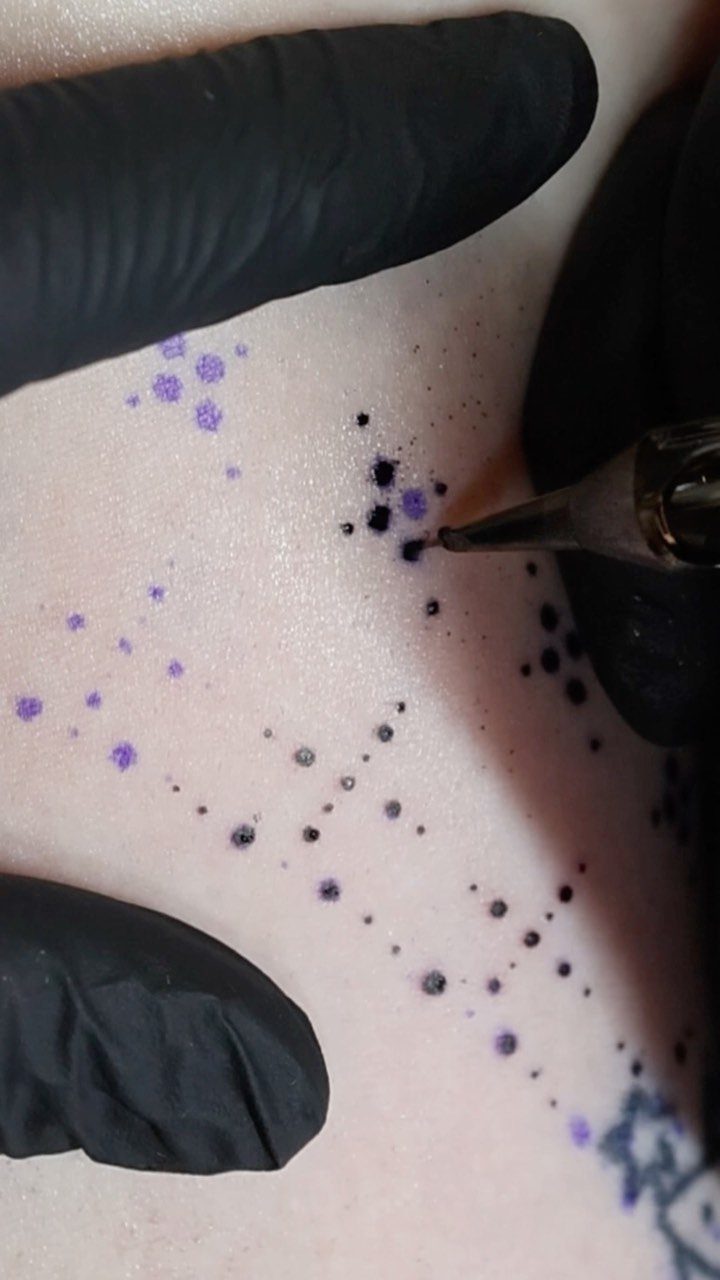
The machine moves across the stencil one section at a time, building up the dotwork shading while the purple guide stays visible underneath.
The stencil keeps the geometric pattern symmetrical, and the artist follows it closely because even a small shift in spacing breaks the rhythm.
Dotwork takes longer than solid fill because each dot is a separate motion. The stencil has to hold through the entire session.
If the purple starts to fade before the session ends, a good artist can still finish by following the sections already inked. Wiping too often speeds up fading, so expect fewer breaks than you would with line work alone.
9. Inspirational Script and Rose Design

A digital stencil lets you print the design at home and size it to fit your forearm before the appointment.
The rose, eye and script sit in separate zones, so you can adjust the layout to follow your arm’s curve without crowding the elements together.
The red text stands out, but red ink loses brightness sooner than black and needs a touch-up to stay vivid. If you want the design to last without maintenance, ask your artist to print it in black only.
Script this small has to be sized carefully. Letters under a quarter inch tall can blur as the tattoo ages, turning words into dark smudges that no longer read clearly.
10. Angel and Dragon Arm Stencil
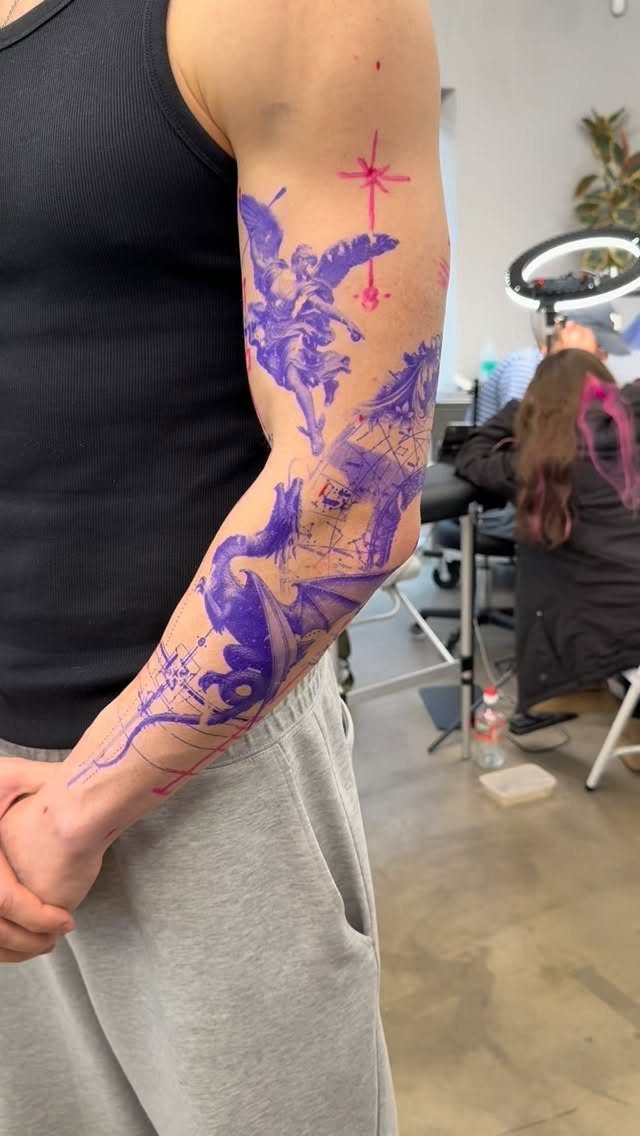
Dual stencils in purple and red let the artist track 2 overlapping designs without mixing up the linework mid-session.
The angel and dragon share the forearm but stay separate, and the color-coded guides make it easy to see which lines belong to which figure when the shading starts.
Red stencil ink loses contrast sooner than purple, so the artist usually works on the red section first while the guide is still crisp.
Once that piece is done, the purple lines stay visible long enough to finish the second design.
Two full figures on one forearm take at least 2 sessions. Trying to finish both in one sitting often leads to rushed shading or a stencil that wipes off before the work is done.
11. Snake and Peony Outline
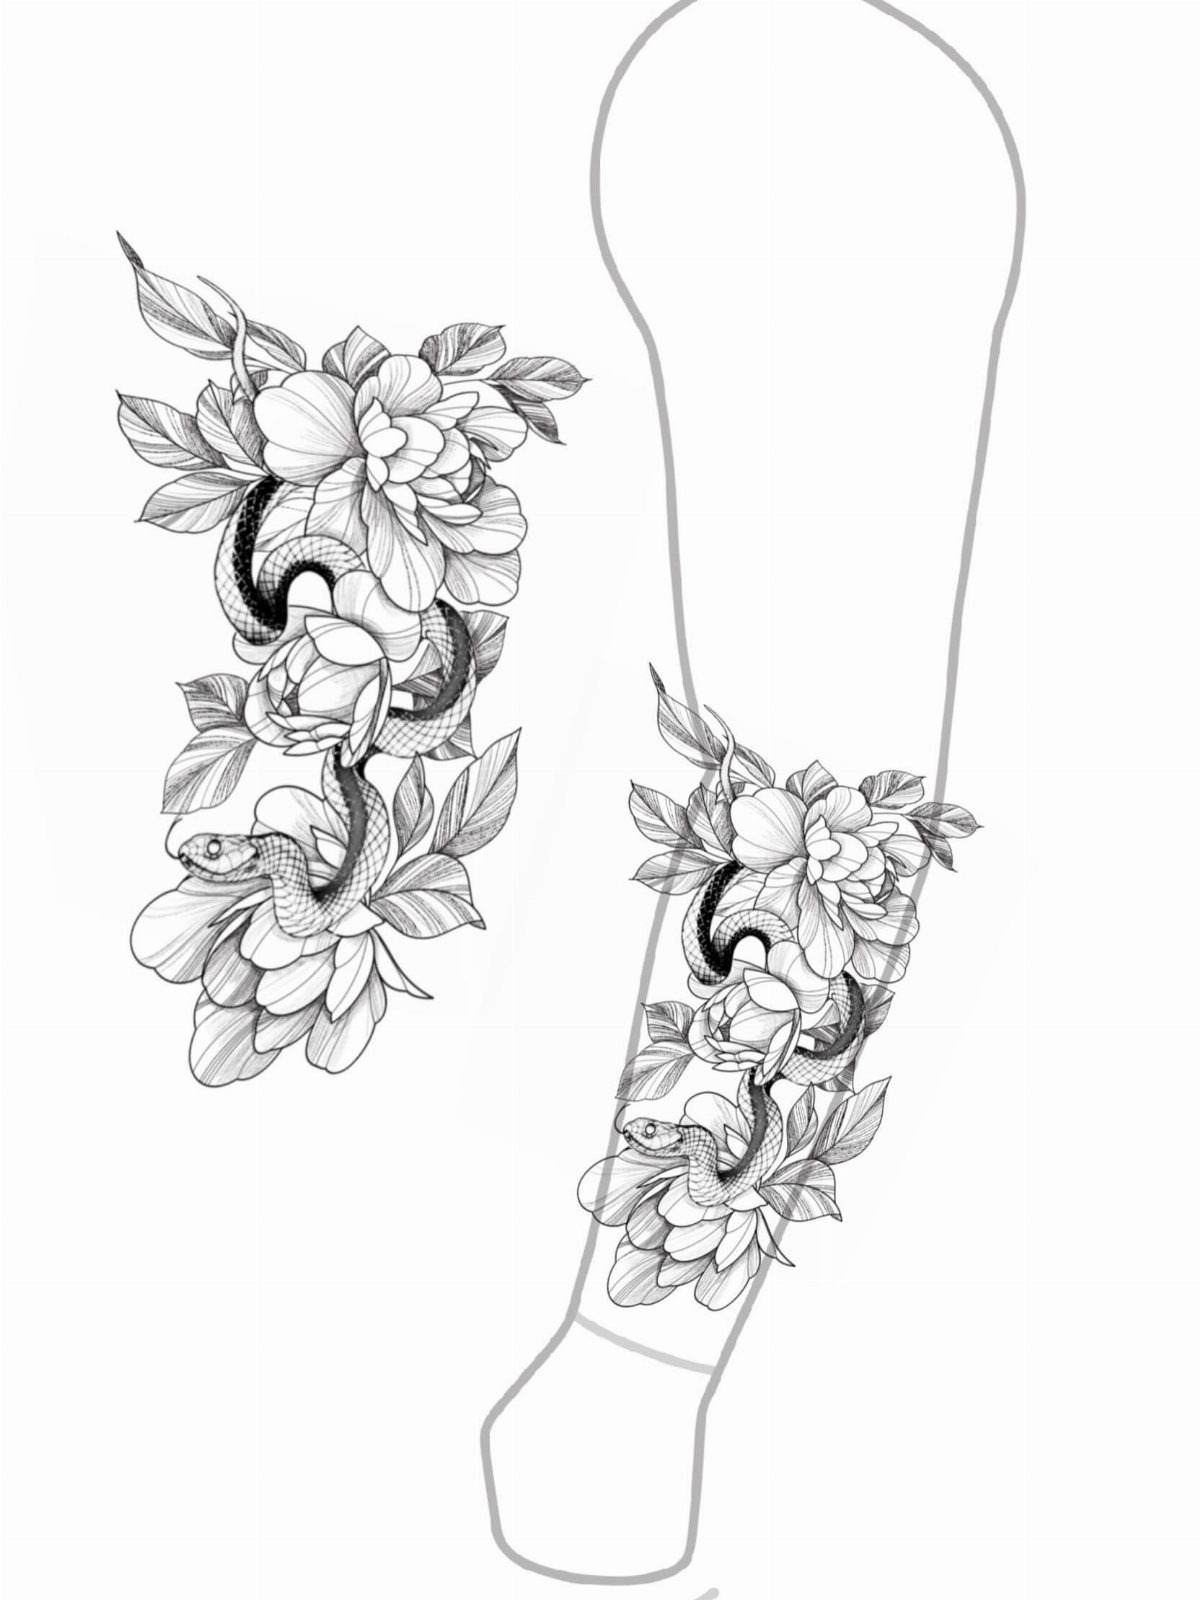
A flat stencil transferred straight from paper often distorts once it hits a rounded surface. Mapping it first saves time and keeps the design from looking pinched or stretched after it heals.
Black line work this detailed holds up better than shaded versions because there is no gradient to fade unevenly. Grey shading added later builds on the outlines, and the stencil gives the artist a clear structure to follow.
12. Floral Arm Sleeve Stencil
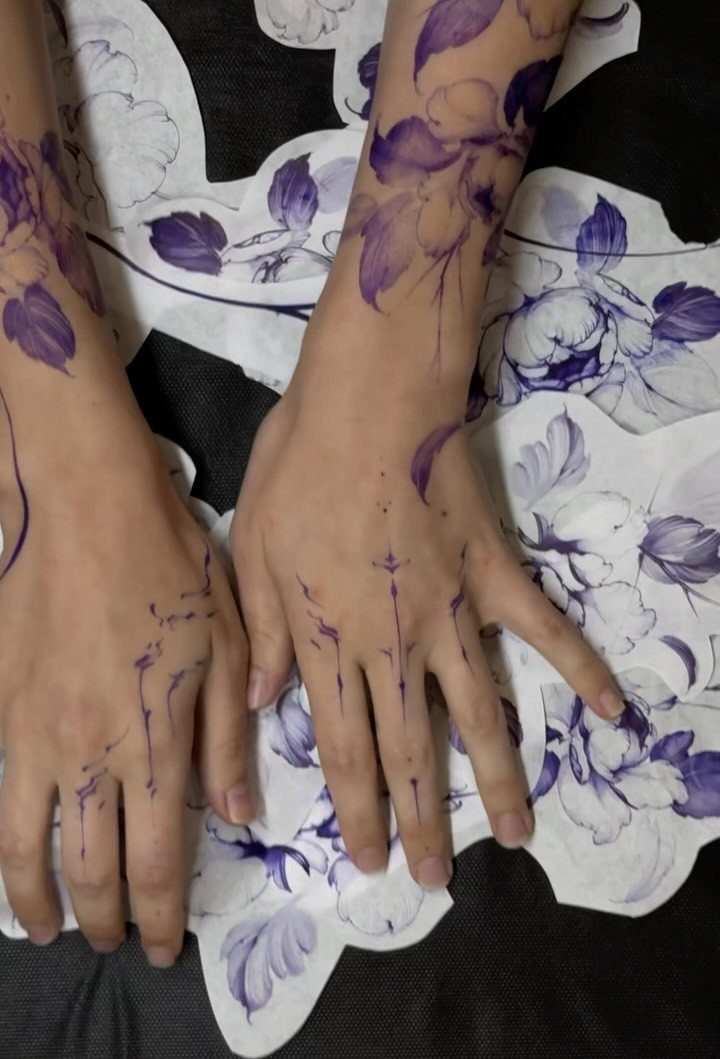
A full floral sleeve stencil covers both arms and hands in one continuous pattern, and the matching transfer paper shows the design at full scale before it goes on your skin.
Laying the stencil this way lets you see how the flowers connect across your wrists and whether the spacing works when your arms hang naturally.
Sleeves that extend onto the hands fade faster because hand skin sheds and regenerates more often than arm skin. Plan on a touch-up within a year for the fingers and knuckles if you want the detail to stay sharp.
A stencil this large takes patience to apply. Any bubble or wrinkle in the transfer will leave a gap in the guide, and fixing it mid-session is harder than getting it right the first time.
13. Winding Arm Line Stencil
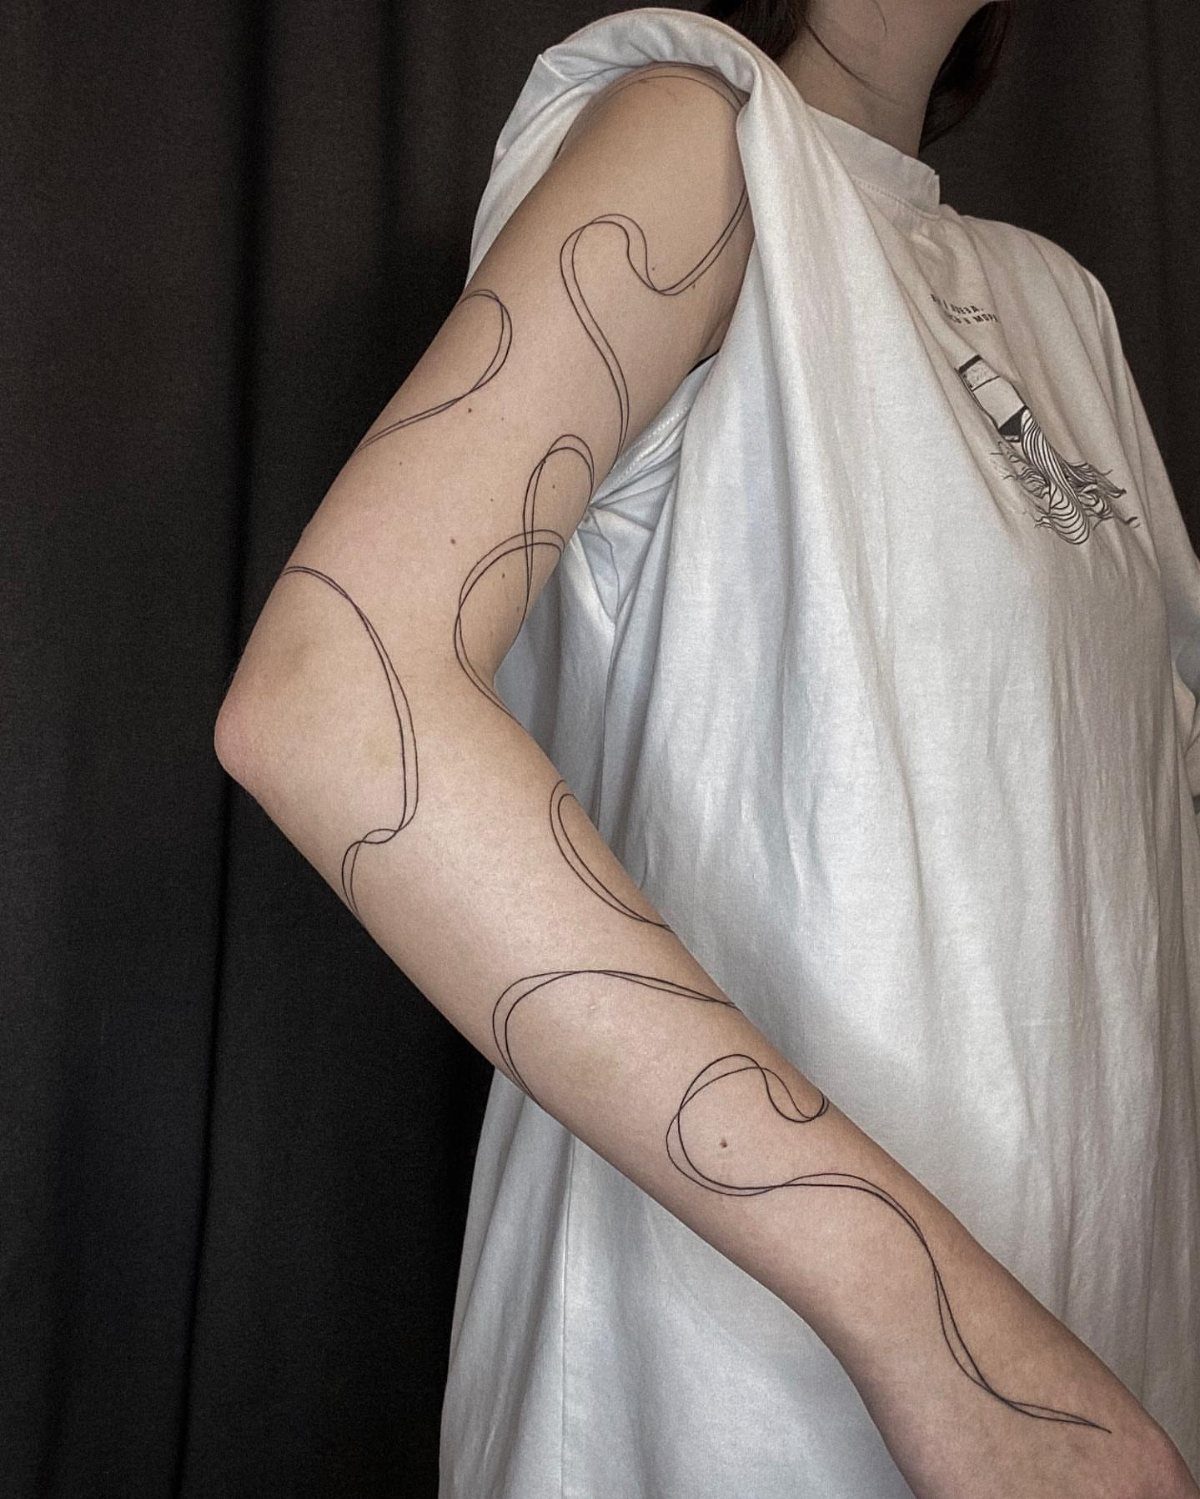
A thin line that winds down the whole arm without breaking keeps the design organic and lets the eye follow one continuous path from shoulder to wrist.
The stencil has to be applied in sections because thermal paper will not bend smoothly around the full length of an arm, and any gap between sections shows up as a broken line once the ink goes in.
Placement along the outer arm keeps the line visible and readable when your arm hangs naturally. Inner arm placement hides more of the design and risks distortion around the elbow when you bend.
Single-line work this long takes focus. Any wobble in the hand becomes permanent, so an experienced artist matters more here than with designs that can hide a shaky section inside shading or pattern.
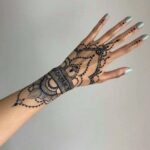
14. Gothic Hand and Forearm Stencil
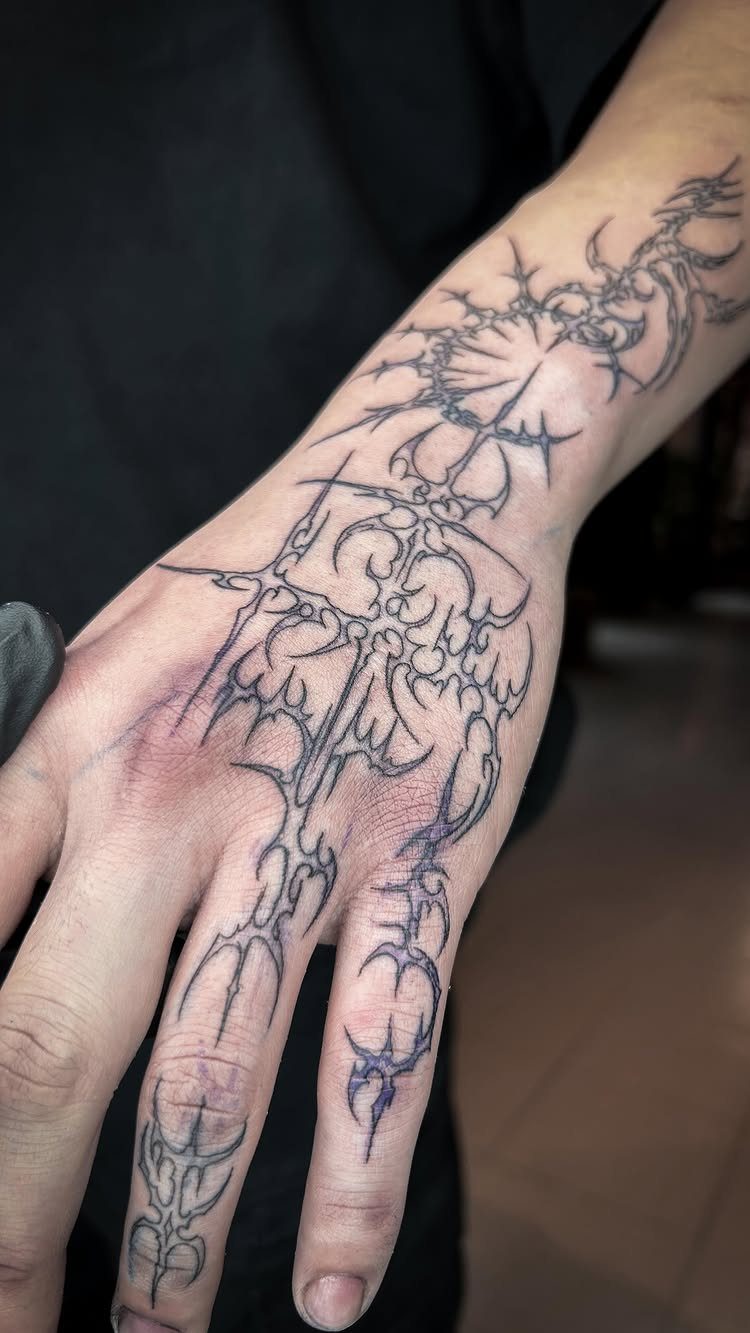
Gothic stencils pack sharp points, thin filigree and tight spacing into a small area, and the hand is one of the hardest placements to keep clean.
Skin on the fingers and knuckles moves more than forearm skin, so lines this detailed can blur or spread as they heal.
The stencil has to wrap across the knuckles and into the valleys between tendons without buckling. A bubble in the stencil means stopping mid-needle to freehand the rest, and that fine pattern you approved is now a guess.
The hand sheds outer layers faster, so black fades to gray and crisp edges blur within months. Plan on a touch-up within a year if you want the fine detail to stay sharp.
Frequently Asked Questions
How long will a tattoo stencil last?
Purple transfer ink gives you around 2 hours of working time before it fades, and keeping the area dry helps it last.
The purple wipes off easily with moisture or touch, so avoid leaning on anything once it goes on. Red ink fades quickly, so most artists tattoo those sections first before the lines blur.
How to stencil a tattoo by hand?
Hand-drawn stencils use carbon transfer paper to trace the design directly onto clean, shaved skin, leaving purple lines that guide the needle.
The artist applies stencil fluid or stick deodorant first so the transfer adheres without slipping. A hand-drawn stencil takes more time than thermal paper but lets the artist adjust curves to fit your arm’s natural shape as they go.